Standoff Installation Guide For Mounting Your Metal Wall Art
Mounting your metal wall art with standoffs is easier than you think! This guide will walk you through the process step-by-step so you can display your artwork with a sleek, modern finish. Standoffs elevate your piece off the wall, creating a striking 3D effect that enhances its visual appeal.
What You’ll Need
- Your metal wall art (with pre-drilled holes)
- Standoff kit (included with your purchase: standoff barrels, caps, screws, and wall plugs)
- Electric drill with a 6mm masonry bit (for brick or concrete walls) or a 4mm bit (for wood or drywall)
- Screwdriver (Phillips head recommended)
- Pencil for marking
- Level to ensure alignment
- Measuring tape
Step-by-Step Installation
Step 1 – Mark the Wall for Hole Placement
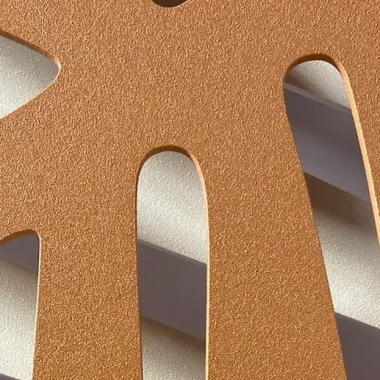
Your metal wall art has been predrilled with appropriately sized holes in each corner and in key areas of the artwork. Depending on the size of your art you may have additional holes and standoffs included with your order. Have an assistant hold the artwork to the wall at the position you wish to mount it, ensuring that the art is properly leveled. Mark the center of each hole on the wall.
Tip: If you are installing multi-panel artwork then you may want to make additional alignment markings or use a spirit level to be absolutely sure your artwork is level.
Step 2: Drill The Holes
Drill a pilot hole at each marked location using a 6mm drill bit (size is usually 6mm for most art but may differ on larger artwork. The drill bit size should be the same size as the supplied wall anchors). You can hold the wall anchor next to your drill bit to see how deep you need to drill the hole. The hole only needs to be slightly deeper than the length of the wall anchor. Aim for 40mm depth.
Insert the plastic/nylon wall anchors and knock them in flush with the wall using a mallet or hammer. Be careful not to hit the wall with the hammer as it may cause some unwanted marks or damage to your wall.
Tip: Tape a plastic bag to the wall just below where you will be drilling your holes, this will help collect most the dust from drilling into the wall and make clean up a lot easier. You can pull it off the wall and stick under each marking before you drill.

Step 3: Attach Standoff Spacers
Attach each standoff “barrel” or “spacer” to the wall using a star screwdriver and the screws provided with your hardware kit. Ensure that you fasten the spacer tightly to the wall as the spacer will be holding the weight of your metal art.

Step 4: Clean The Wall
Clean any finger prints, dust, pencil markings etc that you may have created during the installation with a damp cloth. We do this before mounting the art as it will be much easier to clean the wall while its still open.
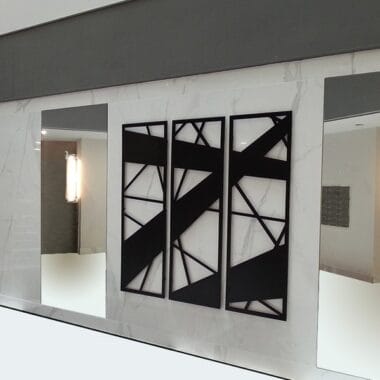
Step 5: Mount the Art
Screw the standoff caps onto the barrels through the artwork’s holes. Tighten by hand until snug—this keeps your piece securely in place while maintaining the floating effect. Don’t forget to use the included protective washers to ensure the metal artwork does not get damaged from the standoff.

Tips for Success
- Double-check your measurements before drilling to avoid misalignment.
- If installing on drywall, consider using drywall anchors for added stability, especially for larger pieces.
- Clean your artwork with a soft cloth before mounting to remove any dust or fingerprints.
Why Choose Standoffs?
Standoffs not only provide a secure mounting solution but also add a professional, gallery-like aesthetic to your decor. The slight elevation creates shadows and depth, making your metal wall art a true focal point in any room. For more on how standoffs enhance displays, see Wikipedia’s entry on Display Stand Design.
Maintenance and Care
Once your metal wall art is installed, keeping it looking its best is simple. Wipe it down occasionally with a damp cloth to remove dust. For more information on caring for metal-based art, see Wikipedia’s page on Metal Cleaning and Maintenance, which covers general techniques applicable to decorative metal pieces.
Enjoy your newly mounted metal wall art! If you have any questions or need assistance, feel free to contact us. For more inspiration on decorating with metal art, explore Michigan Metal Artwork’s gallery.